Best Model Tools for Beginners: What You Actually Need First
Looking for the best model tools for beginners? This practical buying guide separates essential supplies from optional upgrades, so you can spend money on tools you will actually use. Learn when basic double-blade nippers are enough, how files and sanding materials help clean up parts, and when a hobby knife, tweezers, cement, or painting supplies become useful. It also compares starter setups for different budgets and skill levels.
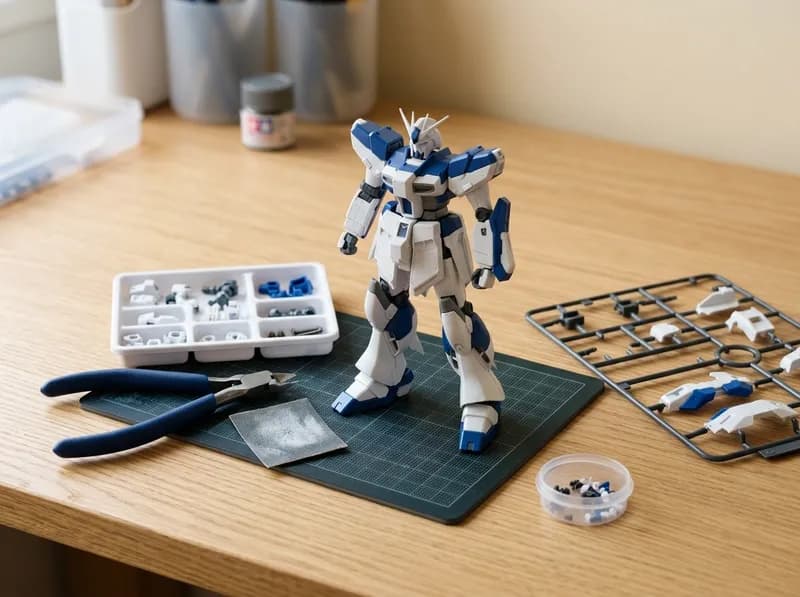
You don't need a box full of specialized tools to build your first plastic model. For many snap-fit Gunpla kits, a pair of hobby nippers, something to clean up the remaining plastic, and a stable work surface are enough. A hobby knife, sanding tools, and tweezers can make certain jobs easier, but there's no reason to buy them all before you know what your first kit requires.
Search for the best model tools for beginners and you'll find plenty of large starter kits promising dozens of essential accessories. The problem is that a high piece count doesn't necessarily mean better value. Some sets include duplicate tools, coarse abrasives, and accessories that a beginner may never use.
A small, well-chosen setup is usually a better place to start. Buy the tools that help you assemble the model, add finishing supplies when you need them, and leave specialized equipment until you have a project that calls for it.
What tools do you need for your first model kit?
The right starter tools depend on the kit and the finish you want. A snap-fit Gundam model has different requirements from a cement-assembled aircraft or a painted military vehicle.
Tool or supply | Priority | What it's for | Buy it now? |
|---|---|---|---|
Plastic-model nippers | Essential for most runner-based kits | Cutting parts from runners | Yes |
Fine file or sanding paper | Recommended | Cleaning up gate marks | Start with one simple option |
Stable work surface | Essential | Protecting the desk and managing parts | Use a suitable surface you already have |
Small parts tray | Useful | Keeping loose pieces from getting lost | Improvise or buy one |
Good lighting | Essential in practice | Seeing small parts and cut marks | Use an existing desk lamp if adequate |
Hobby knife | Optional at first | Trimming small remnants and details | Add when needed |
Tweezers | Optional at first | Handling tiny parts and decals | Buy if handling parts becomes difficult |
Plastic model cement | Kit-dependent | Bonding compatible plastic parts | Only if the kit requires it |
Sanding sticks or sponges | Optional | Smoothing surfaces and working around curves | Add when basic abrasives aren't enough |
Panel-line products | Optional finishing | Emphasizing recessed details | Wait until you want to try panel lining |
Top coat | Optional finishing | Unifying the sheen and protecting markings | Buy for a specific finishing plan |
Paint and masking supplies | Project-dependent | Changing colors and adding painted details | Buy according to the instructions |
Pin vise and drill bits | Specialized | Drilling holes and modifying parts | Wait for a specific task |
Airbrush and compressor | Advanced investment | Applying paint with a spray finish | Skip for your first unpainted kit |
This list is a starting point, not a mandatory shopping list. Many snap-fit Gunpla kits can be assembled without cement, paint, panel lining, or a hobby knife. Cars, aircraft, ships, and military models may require additional tools depending on their construction and the finish shown in the instructions.
If you're not sure which kind of modeling you'll enjoy, choose one beginner-friendly kit and buy only what you need to complete it. You'll have a much clearer idea of what to upgrade after that first build.
The first tool to buy: plastic-model nippers
Hobby nippers are the one specialized tool most beginners should prioritize. They cut parts from the sprue, also called a runner, without the crushing and tearing that can occur with unsuitable household cutters.
A poor cut can leave a large nub, white stress marks, or a damaged edge. Those marks are often more noticeable on dark or glossy plastic, and fixing them can take longer than making a careful cut in the first place.
For your first few kits, a decent double-blade pair is usually sufficient. You don't need to spend $50 or more on precision nippers just to assemble a model.
Double-blade vs. single-blade nippers
Double-blade nippers have cutting edges on both sides. They're generally more forgiving and suitable for the first cut away from the runner, leaving a little plastic between the cut and the part.
Single-blade nippers use one sharpened edge against a supporting surface. On suitable plastic, they can leave a cleaner cut with less visible stress, which makes them attractive to Gunpla builders who care about the appearance of exposed surfaces.
The trade-off is durability. A thin precision blade can chip if you cut thick gates, twist the tool, use excessive force, or try to cut unsuitable materials. Single-blade nippers should be treated as finishing tools, not general-purpose cutters.
A reliable technique is to cut the part away from the runner first, leaving a small amount of plastic attached. Then remove the remaining gate with a suitable nipper, file, or sanding tool. Cutting every gate flush in one pass can put unnecessary stress on the plastic.
Are budget single-blade nippers worth buying?
They can be a sensible middle ground for builders who want cleaner cuts without paying flagship prices. Models from RUITOOL, stedi, and DSPIAE are worth comparing, with some budget single-blade options listed in the roughly $15–$40 range.
They aren't all equivalent, and a lower price doesn't guarantee the same cutting performance or durability as a premium tool. The safest approach is to keep a sturdy double-blade pair for the first cut and reserve the single-blade nipper for the final trim on suitable plastic.
Look for a comfortable grip, a controlled cutting action, clear material and gate-thickness limits, and a protective case if one is supplied.
When should you upgrade? After you've built several kits and can identify a recurring problem with gate cleanup. If you're happy with the results from a basic pair, there's no need to upgrade simply because other builders use more expensive tools.
Sanding sticks, sandpaper, and glass files
Nippers remove parts from runners, but they won't always leave a perfectly smooth surface. Sanding tools help level gate marks, refine edges, reduce some seam lines, and prepare plastic for paint.
The main options have different strengths:
Sandpaper is inexpensive and versatile. It can be cut to fit small areas, although it's harder to keep flat on a tiny part without a backing.
Sanding sticks have a firm backing that makes them useful for flat surfaces and straight edges.
Sanding sponges flex around curves and rounded details.
Glass files can remove plastic efficiently and leave a smooth finish on suitable surfaces. They're less convenient on curves and can break if dropped or stored carelessly.
For a first model, a small selection of abrasives is more useful than a large pack containing every available grit.
A common starting point is around 400–600 grit for removing material, followed by 800–1,000 grit or finer to refine the surface. The right sequence depends on the plastic, the size of the gate mark, and the finish you're aiming for. Coarser abrasives work faster but leave deeper scratches; finer abrasives help reduce those scratches but can't restore detail you've already sanded away.
Use light pressure around panel lines, sharp edges, and small molded details. The aim is to remove the raised plastic, not reshape the part.
Affordable sanding tools to consider
<row> <box width="112px"> <AsyncImage query="Tamiya Finishing Abrasives Fine 87010 model kit sanding sheets packaging" aspectRatio="3:4" width="112px" /> </box> <box flex="1" gap={1}> Tamiya Finishing Abrasives Fine — item 87010
<text color="secondary" size="sm">Listed price: $4.70</text>
Includes 400-, 600-, and 1,000-grit sheets. It's a straightforward option for removing gate remnants and smoothing small surfaces without buying a large assortment.
</box>
</row>
<divider color="subtle" />
<row>
<box width="112px">
<AsyncImage query="DSPIAE SS5 5mm sanding sponge model kit hobby tool" aspectRatio="3:4" width="112px" />
</box>
<box flex="1" gap={1}>
DSPIAE SS5 5 mm Sanding Sponge
<text color="secondary" size="sm">Listed price: $3.99</text>
USA Gundam Store lists this thin sanding sponge in grits ranging from 180 to 2,500. Its narrow format can be useful for small areas, but choose the grit for the task rather than buying the entire range.
</box>
</row>
Prices and availability can change. These are examples of inexpensive, task-focused tools, not products every beginner needs to purchase.
Do you need a hobby knife?
Not necessarily. A hobby knife is useful for trimming small gate remnants, cutting masking materials, and handling certain detail-cleanup tasks. But it isn't a replacement for nippers, and it isn't always the best way to smooth a surface.
For many nub marks, a fine file or sandpaper gives you more control because it removes material gradually. A knife can gouge the plastic or slip if you try to remove too much at once.
If you decide to buy one, choose a comfortable handle that accepts readily available replacement blades. A basic knife is enough for most beginner tasks; a multi-handle set is unnecessary unless you have a particular use for the extra shapes.
Keep fingers out of the cutting path, cut away from yourself, and store spare blades safely. If your first kit has accessible gates and doesn't require detailed trimming, you can postpone buying a knife.
Work surface, lighting, and small-part storage
These aren't glamorous model-building tools, but they can make the first build much easier.
A stable work surface gives you room to follow the instructions, sort parts, and cut safely. A cutting mat protects the desk from scratches and accidental cuts. A self-healing hobby mat is convenient, but you don't need one if you already have a suitable surface and can protect it properly.
Good lighting helps you see gate marks, small connectors, and the edge of a blade or file. A desk lamp may be all you need.
A small tray or shallow container is useful for keeping loose parts together. You don't have to buy a dedicated hobby organizer: a clean household container can work, provided it's stable and suitable for the task.
Tamiya's plastic-modeling guidance treats cutting, sanding, cement, decals, and painting as separate parts of the process. That's a useful way to approach your own setup, too. Buy tools for the jobs you're actually going to do rather than trying to equip yourself for every modeling technique at once.
Tweezers: useful for tiny parts and decals
Tweezers are worth adding when your fingers are too large for the parts you're handling. They can help position small components, stickers, masking pieces, and water-slide decals.
A basic metal pair is enough for most beginners. Straight and angled tips can be useful for different tasks, but you don't need a collection of specialized tweezers before you've encountered a job that requires them.
Tamiya's U.S. store lists its Straight Tweezers at $9.75 MSRP and Angled Tweezers at $13.00 MSRP. Those are examples rather than required purchases; an existing pair that grips small parts securely may do the job.
Buy tweezers when you find yourself repeatedly dropping tiny pieces or struggling to position markings accurately.
Tools to add when your kit or finishing plans require them
Once you've built a basic kit, the next purchases depend on whether you want to assemble more complex models, add surface detail, or paint.
Plastic model cement
Plastic model cement is intended for kits with parts designed to be bonded together. Many cement products soften compatible plastic surfaces so the parts can form a joint. They are not interchangeable with every household adhesive.
Tamiya Extra-Thin Cement, item 87038, is listed at $6.25 MSRP for a 40 ml bottle with a brush under the cap. Tamiya describes it as suitable for polystyrene plastic and designed to flow into close-fitting joints. Its U.S. manufacturer listing has been marked temporarily out of stock, so check specialist hobby retailers for availability.
Buy cement when the instructions call for it or when a particular assembly requires bonding compatible plastic. Many modern snap-fit Gunpla kits can be assembled without it.
Read the product label, use it only on compatible materials, and follow the stated ventilation and handling instructions. Keep it away from clear parts and finished surfaces unless the product directions specifically support that use. Super glue may be useful for some repairs or mixed materials, but it isn't a universal substitute for plastic model cement.
Panel lining
Panel lining emphasizes recessed lines and molded details. It's especially popular with Gunpla builders, but it is an optional finishing technique rather than a requirement for assembling a model.
The main approaches include:
Panel-line markers: Usually the easiest place to start. They let you trace recessed lines and remove excess, depending on the marker's instructions.
Enamel panel-line washes: Thin liquids that flow into recesses and can produce a crisp result, but require more care.
Brush-applied washes and pencils: Alternative methods that may suit particular finishes and levels of control.
Tamiya Panel Line Accent Color is listed at $7.75 MSRP. Tamiya warns that the enamel product can make plastic brittle and advises avoiding movable or load-bearing parts. Its instructions also recommend application over a suitable lacquer or acrylic base coat.
This is an important distinction for beginners: a product that produces attractive panel lines can still damage a model if used on incompatible plastic or applied incorrectly. Read the manufacturer's directions, check compatibility, and test carefully before using it on a finished build.
For your first unpainted snap-fit kit, you can skip panel lining altogether. If you want to try it later, start with a single marker rather than buying several colors and specialized engraving tools.
Top coat
A top coat is a clear finish applied over a completed model. It can help unify the sheen and protect compatible stickers or decals. A matte finish is popular because it reduces the shiny plastic appearance; gloss, by contrast, tends to emphasize surface imperfections.
Top coat isn't necessary to finish a kit, and it doesn't magically remove deep scratches or badly trimmed gates. It's best treated as a later upgrade after you've learned basic assembly and cleanup.
Spray cans and airbrushed clear coats introduce additional safety considerations. Follow the product's instructions for ventilation and protective equipment, and make sure your workspace is suitable for the materials you're using.
Decals and decal tools
Check the kit before buying decal supplies. Some models include adhesive-backed stickers; others use water-slide decals that must be soaked and positioned.
For simple decals, a small water container, tweezers, and a soft cotton swab or suitable applicator may be enough. Decal-setting solutions can help certain water-slide decals conform to surface details, but the correct product depends on the decal and finish.
A dedicated decal tool set is unnecessary until you know which type of markings your kit uses and how much finishing you want to do.
Basic painting supplies
If you want to paint your first model, buy for that specific project rather than assembling a large collection of colors in advance.
A simple brush-painting setup may include:
A few suitable brushes.
The colors required by the model.
A palette or appropriate mixing surface.
Cleaning materials compatible with those paints.
Primer, if required by the paint system or intended finish.
Masking supplies for areas that need clean color boundaries.
Tamiya's Modeling Brush Basic Set, item 87066, is listed at $6 MSRP and includes two flat brushes and one small pointed brush. The official U.S. page has been marked temporarily out of stock. It's an example of a small starter set, not proof that every beginner needs new brushes.
Paint systems have different requirements. Water-based acrylics, solvent-based paints, and lacquers may need different cleaners and precautions. Check the manufacturer's instructions rather than assuming one cleaning liquid works with every paint.
Masking tape, painting clips, and parts holders become useful when you're painting several components or trying to keep paint off particular surfaces. They aren't necessary for an ordinary unpainted build.
Pin vise and drill bits
A pin vise is a small hand-operated drill used to make controlled holes and carry out certain modifications. Most beginners won't need one to assemble a standard kit.
Buy one when the instructions or a specific modification calls for drilling. Check the required hole size and use a suitable bit rather than guessing. Specialized tools are easier to justify when you have a clearly defined job for them.
What beginners can usually skip
Some tools are excellent for experienced builders but offer little value before you've completed your first model.
Premium single-blade nippers. They can reduce cleanup on visible gates, but they're not necessary for assembly and can be damaged by unsuitable cuts. Start with a suitable basic pair and upgrade when you know why you want a more precise cut.
Large multi-tool starter kits. These can be convenient if the included tools match your needs. But a high piece count may simply mean more duplicates and accessories you won't use. Compare the actual nippers, file, knife, and other essentials rather than buying the largest bundle.
Airbrush systems and compressors. An airbrush can produce smooth coverage and useful effects, but it also adds equipment, paint preparation, cleaning, maintenance, and workspace requirements. You can build attractive models without painting, and brush painting is a reasonable starting point for many projects.
Large paint collections. Buy the colors needed for your current kit. A broad collection makes more sense after you know which subjects and paint schemes you enjoy.
Other purchases to postpone include panel-line engraving tools, photo-etched-part tools, resin-modification equipment, specialized file sets, display accessories, and complex assembly jigs. They all have legitimate uses, but most aren't needed for a standard first build.
An airbrush, premium nipper, or specialized jig isn't a bad purchase in itself. It's simply easier to judge its value after you understand your own modeling habits.
Specific model tools worth considering
The following products illustrate different price points and use cases. Prices are listed U.S. manufacturer or retailer prices where available; they may change with stock, sales, and shipping. These recommendations are based on the stated specifications and intended uses, not on a claim that every tool was independently tested side by side.
<row align="start" gap={3}> <AsyncImage query="Tamiya Basic Tool Set 74016 plastic model tools case" aspectRatio="3:4" maxWidth="112px" /> <box flex="1" gap={1}> Tamiya Basic Tool Set 74016
<text color="secondary" size="sm">$34 MSRP</text>
A six-piece bundle containing plastic side cutters, angled tweezers, small screwdrivers, a craft knife, and a file in a plastic case. It can be convenient if you need most of those tools. If you only need nippers and a simple cleanup tool, buying separately may cost less. The U.S. listing has been marked temporarily out of stock.
</box>
</row>
<divider color="subtle" />
<row align="start" gap={3}>
<AsyncImage query="Tamiya 74035 Sharp Pointed Side Cutter plastic model tool" aspectRatio="3:4" maxWidth="112px" />
<box flex="1" gap={1}>
Tamiya 74035 Sharp Pointed Side Cutter
<text color="secondary" size="sm">$47 MSRP</text>
A precision double-blade cutter with thin, pointed blades for working around delicate plastic parts. It's a specialized upgrade, not a necessary first purchase. Check the manufacturer's cutting limits before using it on thick gates or unsuitable materials. The U.S. store has marked it temporarily out of stock.
</box>
</row>
<divider color="subtle" />
<row align="start" gap={3}>
<AsyncImage query="Tamiya Extra Thin Cement 87038 40ml green bottle" aspectRatio="3:4" maxWidth="112px" />
<box flex="1" gap={1}>
Tamiya Extra-Thin Cement — item 87038
<text color="secondary" size="sm">$6.25 MSRP</text>
A 40 ml bottle with a brush applicator, intended for compatible polystyrene model kits. Buy it when your kit calls for cement; many snap-fit Gunpla builds don't require it. Check current availability because the manufacturer's U.S. listing has been marked temporarily out of stock.
</box>
</row>
<divider color="subtle" />
<row align="start" gap={3}>
<AsyncImage query="Tamiya Modeling Brush Basic Set 87066 three brushes" aspectRatio="3:4" maxWidth="112px" />
<box flex="1" gap={1}>
Tamiya Modeling Brush Basic Set — item 87066
<text color="secondary" size="sm">$6 MSRP</text>
Includes two flat brushes and one small pointed brush. It's a modest starting point for a project that needs brush painting. Choose compatible paint and cleaning supplies separately; the U.S. manufacturer listing has been marked temporarily out of stock.
</box>
</row>
<divider color="subtle" />
<row align="start" gap={3}>
<AsyncImage query="RUITOOL single blade model nippers protective case hobby" aspectRatio="3:4" maxWidth="112px" />
<box flex="1" gap={1}>
RUITOOL single-blade nippers
<text color="secondary" size="sm">Around $18 listed</text>
A budget option for builders who want to try single-blade cutting without buying a premium Japanese model. Listings and buyer feedback can help you assess value, but quality and durability should not be assumed to match flagship tools. Reserve a precision blade for the final cut on suitable plastic.
</box>
</row>
The point of comparing specific tools is to understand what you're paying for. A $6 sanding set may be more useful to a beginner than a $40 precision cutter if the main problem is rough gate marks. Choose according to the task, not the price tag.
Is GodHand worth paying more for?
GodHand makes several nippers, and they shouldn't all be treated as the same tool.
The PN-125 is a precision double-blade model that offers a step up from many generic entry-level cutters while retaining the more forgiving design of a double-blade tool. It's worth comparing if you want a better everyday cutter without moving straight to a delicate single-blade model.
The Blade One Nipper GH-PN-120 is a single-blade option intended to balance cutting performance and durability. The official Japanese store lists it at ¥4,840. That is a Japanese price, not a current U.S. retail price, and it excludes any applicable shipping or import costs.
The SPN-120 Ultimate Nipper 5.0 is GodHand's best-known precision model. It's valued by many builders for clean cuts and reduced visible stress marks, but its thin blade needs careful handling. U.S. listings commonly place it around $45–$60, although actual prices and availability vary. The manufacturer specifies cutting limits for compatible plastic, including stricter limits for transparent or translucent polystyrene.
The important distinction is not simply whether a nipper is single-blade. It's whether the specific model is designed for the material and gate thickness you're cutting, and whether you're willing to use it within those limits.
For a beginner, the usual answer to "Is GodHand worth it?" is not yet. Build a few kits with a suitable basic nipper first. If gate cleanup becomes the part of the process you most want to improve, a precision nipper may then be a worthwhile upgrade.
Best model tools for beginners by budget
These are practical planning ranges rather than exact shopping-cart totals. They exclude the model kit itself and can vary with retailer, shipping, and the tools you already own.
Setup | Best for | What to buy | Estimated tool budget |
|---|---|---|---|
Minimal starter | One basic snap-fit kit | Basic nippers, a suitable work surface, a small parts tray, optional fine sandpaper | $15–$30 |
Balanced beginner | Several kits and basic cleanup | Nippers, a file or hobby knife, a small sanding selection, mat if needed, tweezers if useful | $30–$60 |
Beginner who wants to paint | A first painted model | Basic cutting and cleanup tools, brushes, project-specific paints, palette, compatible cleaners, primer and masking as needed | $45–$100+ |
These ranges are budgeting estimates, not verified totals for complete, currently stocked bundles. Paint, a cutting mat, shipping, and the model itself can change the final cost.
Minimal starter: build one snap-fit kit
Buy a basic pair of plastic-model nippers. Use a stable work surface you already have, and keep loose parts in a small tray or container. Add a simple file or suitable fine sandpaper if the gate marks need cleanup.
You can leave out cement, paint, panel liner, top coat, tweezers, and a hobby knife unless the kit or your preferred finish calls for them. The goal is to finish one model and discover which tasks you actually find difficult.
Balanced beginner: prepare for several builds
If you're planning to build more than one kit, a small selection of sanding materials and a fine file will give you more options for cleanup. A hobby knife becomes useful for detail work, while tweezers help with tiny parts and decals.
This is also a reasonable point to consider a budget single-blade nipper or a matte top coat, especially if you know you want cleaner visible surfaces or a more unified finish.
If your next kits are cement-assembled aircraft, cars, ships, or military vehicles, add compatible plastic model cement. If you intend to stick with snap-fit kits, don't buy cement simply to fill a toolbox.
Beginner who wants to paint
Painting requires more than brushes. Budget for the paint colors and cleaning materials needed by the particular project, and consider whether you need primer, masking supplies, and a suitable work area.
Brush painting usually involves less initial equipment than an airbrush setup. An airbrush can be worth the investment later, but its total cost includes the airbrush, compressor, compatible paints and cleaners, maintenance supplies, and suitable ventilation and protective measures.
A spray booth alone doesn't automatically make every spraying setup safe. Check the requirements for the specific paint, solvent, and application method before you start.
Common beginner mistakes and what to do instead
Common mistake | Better approach |
|---|---|
Buying a large tool set before choosing a kit | Read the instructions and buy tools for the build in front of you |
Assuming premium nippers are essential | Start with suitable basic nippers and learn controlled cutting |
Using scissors or nail clippers on runners | Use plastic-model nippers to reduce crushing and uneven cuts |
Cutting every gate flush in one pass | Leave a little material on the first cut, then trim progressively |
Using precision nippers on thick gates or metal | Follow the exact tool's material and cutting limits |
Buying dozens of sanding grits | Start with a few useful abrasives and add more when needed |
Buying paint before checking the instructions | Choose colors and supplies for a specific project |
Adding cement to every snap-fit kit | Use cement only when the construction method calls for it |
Treating panel lining, decals, and paint as compulsory | Finish the basic build first; add techniques you actually want |
Buying an airbrush immediately | Try an unpainted build or brush painting before investing in spraying equipment |
Using random glue or solvent on clear parts | Check material compatibility and product instructions |
Leaving blades and small parts loose on the desk | Store sharp tools safely and use a small tray for loose components |
One habit is worth developing from the beginning: work on one part at a time. Check the part number, remove only the pieces you need, and follow the assembly sequence. Bandai's beginner guidance recommends using plastic nippers to remove parts from runners and then trimming the remaining gate material.
Safety and tool care
Plastic modeling is approachable, but cutters, blades, adhesives, paints, and small parts still need careful handling.
Knives and nippers: Keep fingers out of the cutting path. Use controlled pressure, follow the tool's material limits, and store blades safely.
Flying fragments: Wear suitable eye protection when a cutting task could send plastic fragments toward your face. Keep small parts and sharp tools away from children and pets.
Adhesives and solvents: Read the product label, use materials compatible with the plastic, keep containers capped, and follow the specified ventilation instructions.
Painting and top coat: Sprays can create inhalation hazards from mist and vapors. The required controls depend on the material and method, so don't assume an ordinary room or an arbitrary mask is sufficient. Follow the product's safety instructions and applicable workplace guidance.
Tool maintenance: Clean tools as directed and inspect precision nipper blades for damage. Don't keep using a damaged blade or force a tool beyond its intended limits.
The aim is to use a few suitable tools well, not to own equipment for every possible technique.
Frequently asked questions
What tools do I need for my first plastic model kit?
For many snap-fit kits, start with plastic-model nippers, a suitable work surface, and a small tray for loose parts. A fine file or sanding paper is useful for cleaning up gate marks. Add a hobby knife or tweezers if your kit or preferred finish requires them.
Can I use nail clippers or scissors instead of model nippers?
They may remove a part in a pinch, but they aren't ideal. Their jaws can crush or stress the plastic, leaving uneven edges and marks that require more cleanup. A basic pair of plastic-model nippers is a better first purchase.
Can I build Gunpla without expensive nippers?
Yes. A suitable basic pair of nippers is enough for many first Gunpla builds. Premium single-blade models can reduce cleanup on suitable cuts, but they aren't required to assemble the kit.
Are single-blade nippers worth it for beginners?
They can be useful if you plan to build many kits and want cleaner cuts on visible surfaces. However, they are more delicate than many double-blade cutters. A budget model in the $15–$40 range may be a reasonable way to try single-blade cutting, provided you follow its limits and use it for the final trim rather than the first cut.
Are cheap model tool kits from Amazon any good?
Some are serviceable, particularly if you need several basic tools at once. The main concern is that a large piece count can hide mediocre cutters, duplicate accessories, or tools that don't suit your projects. Compare the actual nippers, file, and knife with what you need instead of choosing by the number of pieces in the box.
Do Gunpla kits need glue?
Many modern Gunpla kits are designed to snap together without cement. Other plastic models may require cement, so follow the kit instructions and use an adhesive compatible with the material.
What grit sandpaper should I use for model kit nub marks?
A common starting point is 400–600 grit for removing the raised nub, followed by 800–1,000 grit or finer to refine the surface. The right choice depends on the part and finish. Use light pressure and stop when the nub is level to avoid removing detail.
Do beginners need panel lining tools?
No. Panel lining is an optional finishing technique. If you want to try it on Gunpla, a panel-line marker is generally a simpler starting point than an enamel wash. Some washes can make plastic brittle, so check the product instructions and compatibility before use.
Do I need a top coat for Gunpla?
No. A kit can be assembled and displayed without a top coat. A suitable matte finish can reduce the shiny plastic appearance and help unify the finish, but it is an optional extra that requires appropriate spraying precautions.
Do I need an airbrush to get good results?
No. You can build a good-looking model without paint, and brush painting is a reasonable way to start. An airbrush is useful for certain finishes, but it adds equipment, cleaning, workspace, and safety requirements.
When should I upgrade to premium nippers?
Upgrade when you've built enough kits to identify a recurring problem with gate cleanup and decide that a cleaner cut is worth the cost. Until then, controlled cutting technique and suitable basic tools are often the better investment.
Final recommendation: buy for your first build, not every future build
If you're buying your first plastic model kit, keep the tool list short:
A basic pair of plastic-model nippers.
A stable work surface and a small tray for parts.
A simple file or fine sandpaper for cleanup.
A hobby knife or tweezers only if you find you need them.
Follow the kit instructions, then add tools according to the techniques you want to try. Buy plastic model cement for kits that require it, paint for a project you intend to paint, and specialized tools when a specific task justifies the expense.
The best model tools for beginners aren't the ones that fill the biggest case. They're the few tools that help you finish your first model cleanly and safely, without spending money on techniques you may never use.
Related GuidesMore →
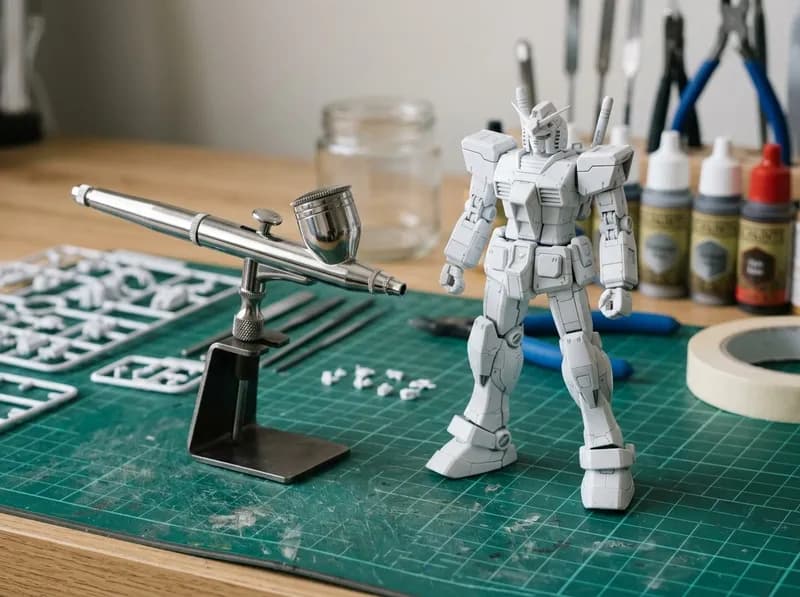
Best Airbrush for Miniatures and Model Kits: Top Picks for Gunpla, Plamo, and Scale Modeling
Looking for the best airbrush for model kits without overspending on features you may not need? This buying guide compares airbrushes for Gunpla, plamo, aircraft, tanks, and car models, from the entry-level Iwata NEO CN to the versatile Eclipse HP-CS and configurable Evolution 2024 CRplus. Learn how 0.3 mm, 0.35 mm, and 0.5 mm nozzles differ in practice, when a dual-action gravity-feed brush makes sense, and what to check before buying.
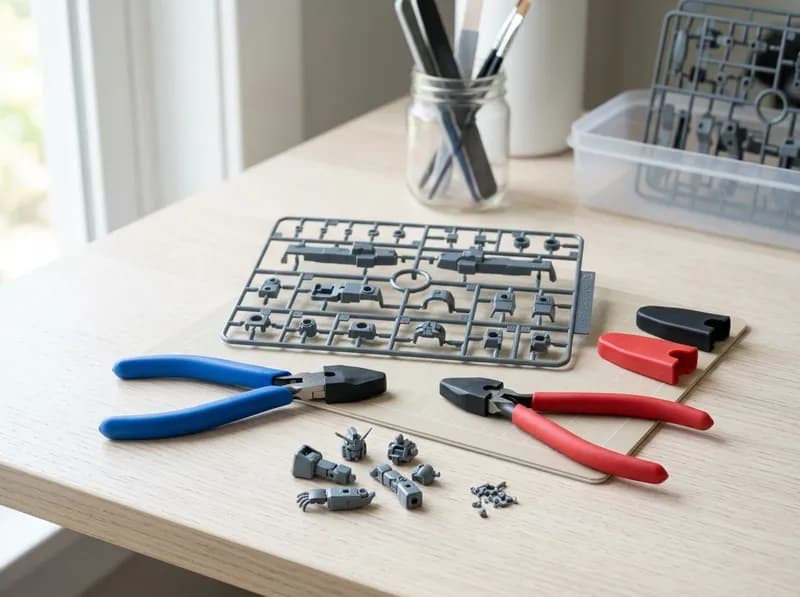
How to Choose Model Nippers: Single-Blade vs. Double-Blade
Choosing the right model nippers depends on the materials you cut, the size of the gates, and how clean you want the finished parts to look. This buying guide explains the differences between single-blade and double-blade nippers, when a two-tool workflow makes sense, and which features matter most. Compare options from GodHand, DSPIAE, and Tamiya, including blade geometry, jaw clearance, cutting limits, and price.
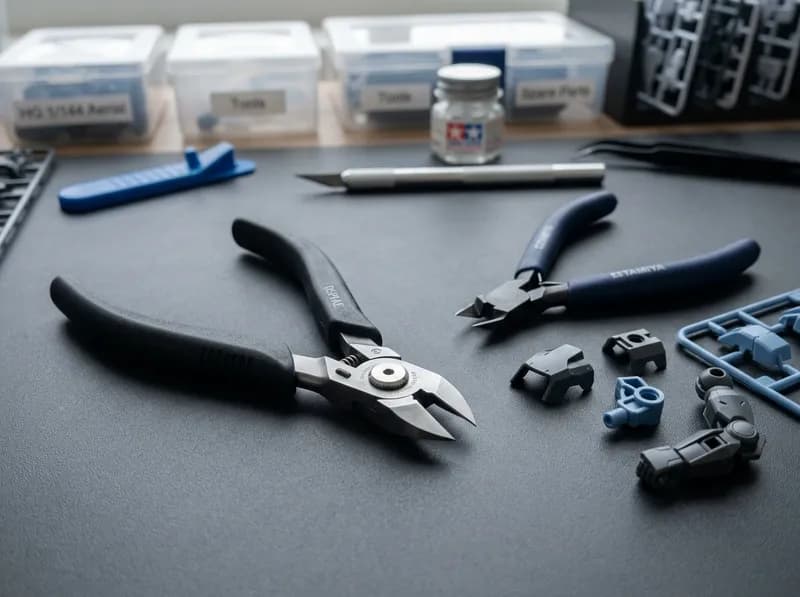
DSPIAE ST-A 3.0 vs GodHand SPN-120: Which Single-Blade Nipper Should You Buy?
The DSPIAE ST-A 3.0 and GodHand SPN-120 are two premium single-blade nippers designed for precise Gunpla gate removal. This comparison examines their cutting performance, handling, durability, limiter design, value, and suitability for different Gunpla grades. It also explains why a conventional nipper plus one precision single-blade tool is often a more practical setup than owning multiple premium nippers.